When you first walk into Greeley Gallery, you’ve likely seen staff members rolling joints behind the counter. They make it look so easy as they expertly manipulate the rolling paper with a small pile of perfectly rolled ones next to them. But any novice knows that rolling a perfect joint isn’t as easy as it looks. The good news is there’s no reason you need to know how to roll a joint. The beautiful joints our staff rolls are for our prepacked GG Joints for sale at our dispensary.
Then again, rolling joints are a fun talent and can come in handy, especially if you don’t have a pipe or bong handy. It’s also pretty easy once you get the hang of it. You might even find the process a bit cathartic. We can teach you how to roll a joint in 5 easy steps. In fact, we’ll do it right now.
What You’ll Need:
- Dried cannabis flower
- Grinder (optional but recommended)
- Small strip of paper or cardboard (optional but recommended)
- Rolling paper
- Pen or something similarly shaped.
All these items (except the pens) are available at Greeley Gallery.
1. Break Up and Grind Cannabis
Once you have your dried cannabis flower, the first thing you’ll do is turn the buds into smaller particles – but not dust. You achieve this by breaking up the larger buds into smaller ones and then using a grinder to grind the smaller buds down into small flakes of cannabis. You can do this by hand if you don’t have a grinder, but you’ll end up with sticky fingers.
Grinders come in various sizes and make breaking up cannabis faster, easier, and cleaner. In addition to keeping your hands clean, they also contain cannabis flakes so they don’t make a mess. If you don’t use a grinder, then break your weed up on a sheet of paper or something similar. You’ll want your weed to be consistent without lots of clumps. The point is to allow optimal airflow and a steady burn rate.
2. Make a Crutch
Set aside you’re the flakey dried cannabis you just broke up because now you need to fashion yourself a crutch. The crutch is the part of a joint that keeps the rolling paper from collapsing when you inhale. It also helps prevent your bud from falling out and keeps your fingers from burning when you reach the end.
You can use almost anything to make one – paper, cardboard, or a torn-off strip of a business card works great. The material just needs to be sturdy enough to allow the smoke to exit the joint when inhaling. Simply tear a strip a little less than an inch long and about as wide as your fingernail, roll it into a cylinder, then set it aside with your ground cannabis flower.
3. Sprinkle onto Rolling Paper
There are many rolling paper styles, and they’re for sale just about everywhere – including Greeley Gallery, of course. It doesn’t matter which one you choose as long as it’s made to be smoked and isn’t a sheet of printer paper or a receipt which can be dangerous.
If you look closely at a single rolling paper, you’ll see a small glue strip along one of the longer edges. Rotate the paper until the glue and the crease along the middle are face down, then fold the paper gently the opposite way of the crease until it maintains the shape you need. Next, sprinkle some of the cannabis you ground earlier on the rolling paper, distributing it evenly but leaving a little space at both ends.
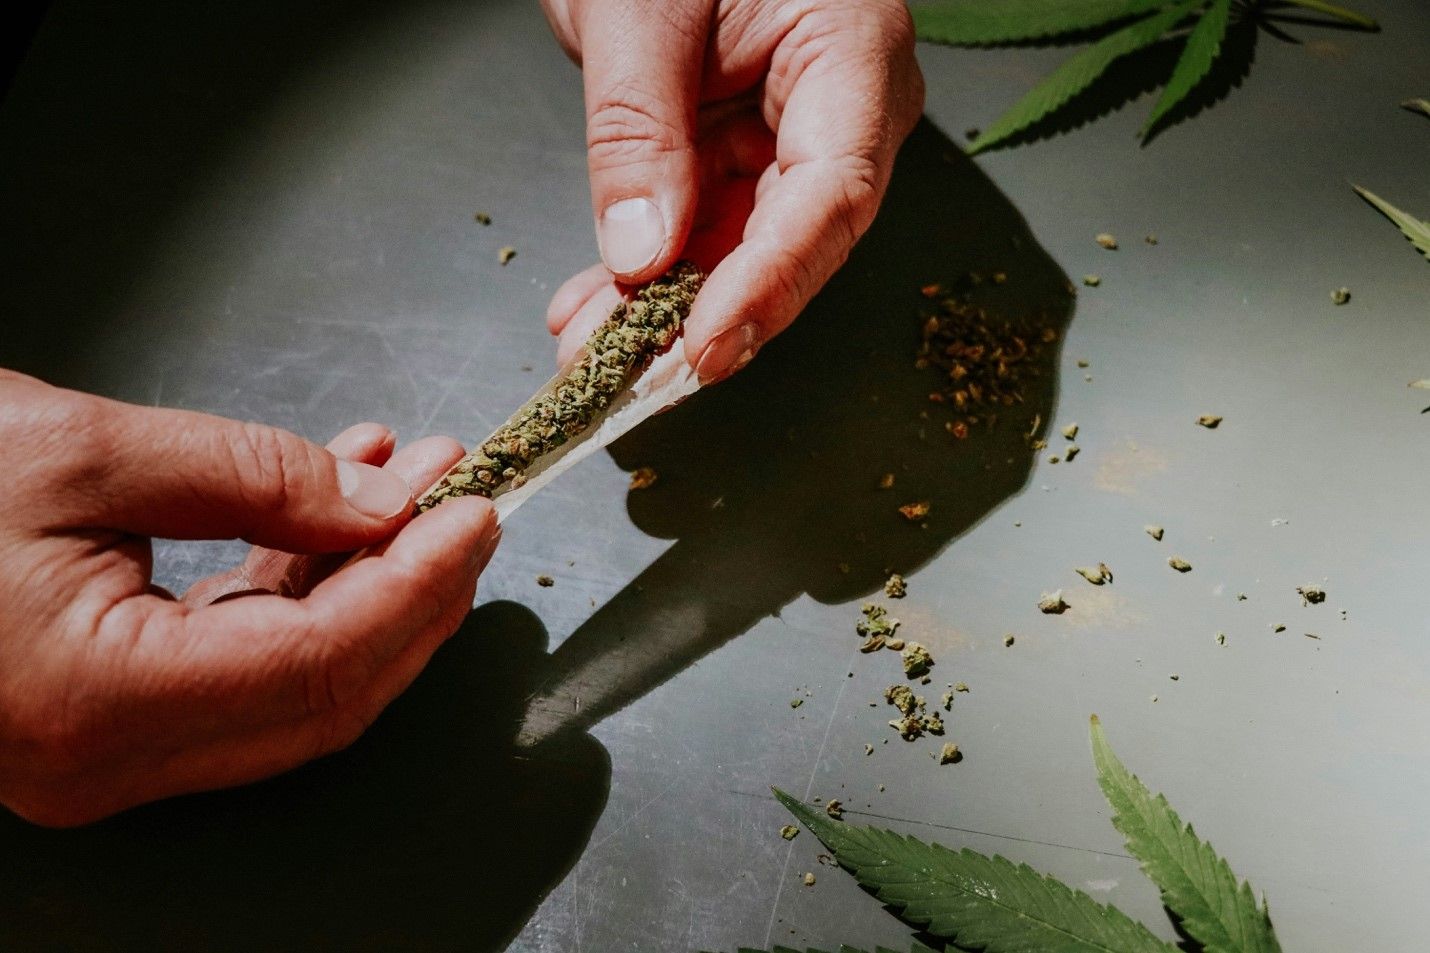
4. Roll
Carefully pick up the rolling paper with both hands and roll it lightly between your thumb and index (pointer) fingers. This is the trickiest part of the entire process, so don’t feel bad if you struggle at first.
Your goal is to shape the cannabis into an evenly dispersed cylinder. Ideally, it is not so tight that it restricts airflow but not so loose that it burns unevenly. For now, just focus on getting familiar with slowly moving your fingers from left to right and back again. Don’t worry too much if some weed falls out; you can always add it back in at the end.
Once you feel it’s as good as you can get it, add your crutch from earlier to one of the ends of your joint. Locate that line of glue we mentioned, and keeping some fingers over the filter, roll the joint up starting at the end without the glue. If including the crutch at this point is too difficult, you can roll the joint without it and insert it during the next step. Once that’s done, pat yourself on the back! The hard part is over, and it’s only smooth sailing from here.
5. Lick, Pack, and Twist
This one might sound like the name of a new dance move, but it’s actually the final touches to complete your joint. Now that you have your joint shaped to your desire and rolled all the way, it’s time to lick the glue line and seal it.
If you decided to hold off on adding your crutch earlier, this is the time to insert it. Then rotate your joint so its crutch side is down and insert a pen or something similar to pack the cannabis gently. This is also a good time to add back in any weed bits that fell out while you were rolling.
Finally, the last (and easiest) step is to twist the opening of your joint closed. Now, one end of your joint is twisted, and the other has the crutch you inserted earlier. Ta-Da! You made a rolled a joint! Congratulations! We knew you could do it.
Final Thoughts
It’s okay if the first few joints you roll are laughable. Joint rolling is a skill, and just like any other skill, it takes practice to master it. On the plus side, it’s easy to practice while doing things like watching TV, and the quickest way to get the technique down is to roll multiple in a row rather than only practicing when you want to smoke. Do enough of them, and maybe you can make a bouquet of practice joints for your romantic partner this Valentine’s Day or save them for later.
Greeley Gallery offers a variety of high-quality cannabis strains in grams, eighths, quarters, and ounces. By the time you roll one ounce, you’ll be an expert joint-roller. Ask our friendly and knowledgeable staff about any deals going on or any other questions you have. Greeley Gallery is open every day of the week between 7 a.m. and 10 p.m. We look forward to seeing you!
Written By: Katrina Paulson